The CDM Server can be installed on Linux (Debian and derivates, incuding Ubuntu, Mint) , Mac OS X and of course on Windows. For detailed information on the requirements please refer to CDM Server Requirements. For each CDM database a separate CDM remote web application instance will be launched which will require a significant amount of memory. The CDM server listens per default on port 8080 but can be configured to use another port. Installer packages for the CDM Server are provided in the download section as Debian package and as an executable Windows installer application.
In the following the steps required to install and set up a CDM Server are described for Debian Linux and for Windows XP. Intallation on newer Windows systems has not been tested so far but should be possible. Where necessary the platform dependant steps are described for each operation system individually.
In the following it is assumed that the CDM Server installation is available from this URL: (http://cdmserver.test/). NOTE that this is a fake URL! The actual base URL of your cdm-server is different and depends on your specific setup.
1. Check CDM Server Requirements
Read the CDM Server Requirements document and make sure that your environment meets the mentioned hardware and software requirements of CDM Server. Install any additional software needed before downloading the CDM Server.
2. Download
Linux
Download the latest stable release of the Debian package (cdmserver_x.x.x.-5_all.deb) from the download site.
Windows
Download the latest stable release of the Windows installer executable (EDIT CDM-Server-x.x.exe) from the download site.
3. Installation
The automated installation of the CDM Server configures the server per default to listen on port 8080. If you already have another service using this port you have to change the configuration (see step 3 below) in order to allow the server to startup.
Linux
First of all you need to install an additional package:
sudo apt-get install jsvc
Go to the directory to where you downloaded the Debian package and install it by executing:
dpkg -i cdmserver_x.x.x.-5_all.deb
The resulting output on the terminal should look like the following:
Selecting previously deselected package cdmserver.
(Reading database ... 31748 files and directories currently installed.)
Unpacking cdmserver (from ../cdmserver_0.0.1-1_amd64.deb) ...
Setting up cdmserver (0.0.1-1) ...
 Adding system startup for /etc/init.d/cdmserver ...
   /etc/rc0.d/K02cdmserver -> ../init.d/cdmserver
   /etc/rc1.d/K02cdmserver -> ../init.d/cdmserver
   /etc/rc6.d/K02cdmserver -> ../init.d/cdmserver
   /etc/rc2.d/S98cdmserver -> ../init.d/cdmserver
   /etc/rc3.d/S98cdmserver -> ../init.d/cdmserver
   /etc/rc4.d/S98cdmserver -> ../init.d/cdmserver
   /etc/rc5.d/S98cdmserver -> ../init.d/cdmserver
Starting CDM Server: cdmserver with -Xmx1024M -jar /opt/cdmserver//cdmserver-standalone.jar --httpPort=8080
--ajp13Port=-1 --logfile=/var/log/cdmserver/cdmserver.log
The CDM Server has now been installed on /opt/cdmserver. An according "init"-script has been created at /etc/init.d/cdmserver. Finally the server has been started.
The CDM Server configuration files are located in
/opt/cdmserver/.cdmLibrary
The CDM server can now run with this configuration, but you may want to do further configuration to assign it enough memory and for best performance. Therefore we highly recommend installing the latest Oracle JDK 1.8 and to configure the CDM Server accordingly. Debian and Ubuntu are not including the oracle jdk in the packages so you have to install it manually. After installing the oracle jdk 1.8 you have to create the following file: /etc/defaults/cdmserver
If your CdmServer serves more than 4 instances, you have to increase the -Xmx parameter.
#/etc/defaults/cdmserver

# CONTEXT_PATH_PREFIX per default is set to / in the cdmserver init script
# enable the below line to override this variable
#CONTEXT_PATH_PREFIX=cdmserver

# The JAVA_HOME variable
# must point to the location of the jdk you want to run the CDM Server with
#JAVA_HOME=/opt/java-oracle/jdk1.8

# determine the number of processors available in the system
CPU_CORES=$(nproc)

### jvm memory configuration
#
# -----------------------------
# jvm settings for jdk 1.7:
#JAVA_OPTIONS="-Xmx1024M -XX:PermSize=128m -XX:MaxPermSize=512m -XX:+UseG1GC -XX:ParallelGCThreads=${CPU_CORES} -XX:ConcGCThreads=${CPU_CORES} -Duser.home=$CDM_HOME"
# -----------------------------
# jvm settings for jdk 1.8
JAVA_OPTIONS="-Xmx1024M -XX:+UseG1GC -XX:ParallelGCThreads=${CPU_CORES} -XX:ConcGCThreads=${CPU_CORES} -Duser.home=$CDM_HOME"
Windows
Execute the downloaded installer (EDIT CDM-Server-x.x.exe) and follow the instructions. The CDM Server will be installed as windows service and is being started after prior installation steps have completed.
By default the installer will install the CDM server into the folder "%PROGRAMFILES%/EDIT CDM-Server/" folder. %PROGRAMFILES% usually is "C:\Program Files\" on Windows systems with english localization.
The CDM Server configuration files are found in
%PROGRAMFILES%/EDIT CDM-Server/.cdmLibrary
4. Configuration
During the previous step the CDM Server has been installed.
Now navigate with your web browser to the CDM Server root (http://CDMServer.com:8080/). Access to this page is restricted, thus you are being presented a sign-in box. Unless you change the credentials which are defined in .cdmLibrary/cdm-server-realm.properties file the CDM Server will use the default.

- user: admin
- password: edit
For security reasons it is highly recommended that you change the credentials as soon as possible. If you have problems locating the .cdmLibrary/cdm-server-realm.properties file please refer to 3. Installation. The respective file is a java properties file defining the users, passwords and roles for a Jetty-HashUserRealm (please refer to http://wiki.eclipse.org/Jetty/Tutorial/Realms as reference).
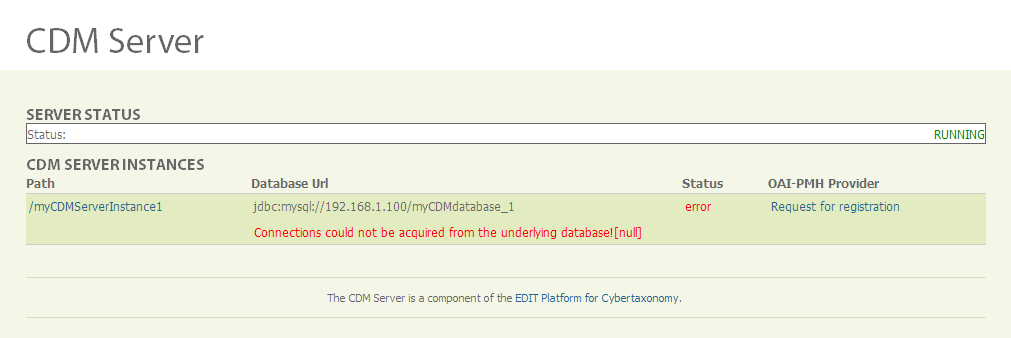
After successful login, you should see an administrative overview on the CDM Server like shown in the image below. This page will report an error since the server has been installed without connecting it to an existing CDM database:

Create the cdm data base
Now it is time to create a data base in your mysql server. You may want to choose a data base name which matches your project name, like for example "cdm_plantae":
echo "create database cdm_plantae;" | mysql -uroot -p
It is highly recommended that you create a mysql user which has grants for this database. Using the root user in the cdm-server configuration is discouraged!
GRANT SELECT, INSERT, UPDATE, DELETE, CREATE, DROP, INDEX, ALTER, CREATE TEMPORARY TABLES, LOCK TABLES ON `cdm_plantae`.* TO 'cdm_user'@'localhost' ...
GRANT SELECT, INSERT, UPDATE, DELETE, CREATE, DROP, INDEX, ALTER, CREATE TEMPORARY TABLES, LOCK TABLES ON `cdm_plantae`.* TO 'cdm_user'@'160.45.63.17%'
In the next step we will configure the cdm-server to use this database.
Configure the cdm data base
Open the data sources configurations file .cdmLibrary/datasources.xml with your favorite text editor. For the exact location of the .cdmLibrary folder see above.
Edit the data source bean settings:
<bean id="cdm_plantae"  lazy-init="true" class="com.mchange.v2.c3p0.ComboPooledDataSource">
      <property name="driverClass" value="com.mysql.jdbc.Driver"/>
      <property name="user" value="cdm_user"/>
      <property name="password" value="my-super-secret-database-password"/>
      <property name="jdbcUrl" value="jdbc:mysql://127.0.0.1/cdm_project_1" />
</bean>
- jdbcUrl: this mysql connect URL must point to a data base on your mysql server
- id: This defines the name of the data base instance under which the server will serve it. In the example above it has been changed from the default "myCDMServerInstance1" to "cdm_plantae".
- driverClass: MUST NOT BE CHANGED!
- name: The login name of a mysql user, which is granted to access the data base.
- password: The users password.
You can define multiple data source beans in the datasources.xml file. Hence, you can configure the server to expose multiple databases at once. For each CDM database a separate CDM remote web application instance will be launched which will require a significant amount of memory (see CDM Server Requirements for more information).
The bean id will be used as name of the specific web application instance and specifies the base path at which the according webservices are available. This path is shown in the administrative overview of the CDM Server (http://CDMServer.com:8080/).
Restart the cdm-server
Once you configured your database restart the CDM Server:
- Linux: Execute the following command in your terminal:
systemctl restart cdmserver.service
orservice /etc/init.d/cdmserver restart
or
/etc/init.d/cdmserver restart
- Windows: Go to the CDM Server application folder and execte the stop and start batch files in %PROGRAMFILES%/EDIT CDM-Server/:
1. stop-service.bat
2. start-service.bat
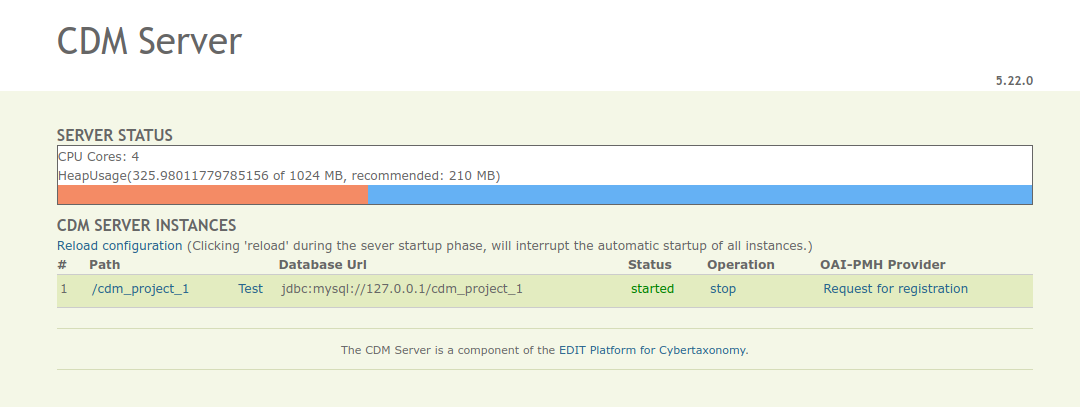
Test your configuration by navigating with your web browser to the CDM Server root (http://CDMServer.com:8080/). Now the CDM Server should list the newly configured data source. The status row should indicate the status "started". The status indicator shows "initializing", if the startup process is not yet finished, and should turn to "started" after some time. This may take several minutes, so please be patient.

The URL to the server instance is our example case is http://CDMServer.com:8080/cdm_project_1/
You can get hold of this URL directly from the CDM Server management console by doing a right click on the link in the "Path" column, and choosing "Copy Link Localion" or whatever suits to you browser.
Advanced Configuration
The CDM Server can be started with different commandline options with are listed in the following. In order to apply these options to a CDM Server running as service you have to edit different configuration files on each platform:
Linux
Edit /etc/init.d/cdmserver and restart the server:
/etc/init.d/cdmserver restart
Windows
Edit %PROGRAMFILES%\EDIT CDM-Server\etc\CDMServer.conf and reinstall the serverbatch by executing the following batch files in %PROGRAMFILES%/EDIT CDM-Server/:
- remove-service.bat
- install-service.bat
- start-service.bat
Command Line Options
-datasourcesuse the specified datasources file. Default is {user.home}/.cdmLibrary/datasources.xml -help print this message -httpPort set the http listening port. Default is 8080 -jmx Start the server with the Jetty MBeans in JMX Management mode. For testing you can use the following jvm options: -Dcom.sun.management.jmxremote.ssl=false -Dcom.sun.management.jmxremote.authentic ate=false -Dcom.sun.management.jmxremote.port=9999 -webapp use the specified webapplication this either can be a compressed war or extracted file. If this option is used extraction of the war from the cdmserver jar file is omitted.Using the following paths developers can run the server completely from the target folder or completely from source: '{cdmlib-project-root}/cdmlib-remote/tar get/cdmserver' '{cdmlib-project-root}/cdmlib-remote/src /main/webapp' -win32service ONLY USED INTERNALLY - prepare for running as win32 service, the server will not be started automatically!
Running the cdm-server behind a reverse-proxy
If you need to run the cdm-server at port 80 or 443 you can configure the http server to act as reverse proxy for the cdm-server.
Configuring apache as reverse proxy:
Add the following to the virtual host configuration:
#
# NOTE: AllowEncodedSlashes is off per default to prevent possible security vulnerabilities.
#       To allow the cdmserver resolving http identifiers via HTTP GET requests it is required to
#       allow encoded slashes. See https://dev.e-taxonomy.eu/redmine/issues/7563
#
AllowEncodedSlashes NoDecode

#
# Reverse Proxie
#
<Location /cdmserver/>
  # lets the  cdmserver run at port 80 for public access
  ProxyPass http://127.0.0.1:8080/cdmserver/ nocanon
  ProxyPassReverse http://127.0.0.1:8080/cdmserver/
</Location>
Also make sure mod_proxy is enabled:
a2enmod proxy
Updating
Below commands document the steps required to update a cdmserver. It is highly recommended to make a backup of the cdm database prior installing the new cdmserver version.
export VERSION='5.24.0'
export URL="https://cybertaxonomy.eu/download/cdmserver/$VERSION/cdmserver_$VERSION-5_all.deb"
rm -f cdmserver_$VERSION-5_all.deb
curl -s -o cdmserver_$VERSION-5_all.deb -O $URL
sudo dpkg -i cdmserver_$VERSION-5_all.deb
Uninstalling
Linux
For removing the cdm package just execute
dpkg -r cdmserver
Windows
Execute the uninstaller executable %PROGRAMFILES%/EDIT CDM-Server/uninstall.exe and follow the instructions.
Trouble shooting
Host 'xxx' is not allowed to connect to this MySQL server"[HY000]
You get an error in the cdm-server log or in the managemnent console, like:
01:11:57.442 [] [main] ERROR e.e.cdm.server.instance.CdmInstance - cdm_plantae :
cdmuser@jdbc:mysql://192.168.22.134/cdm_plantae has problem : null,  message from
server: "Host '160.45.63.172' is not allowed to connect to this MySQL server"[HY000]
There are two means to solve this.
A) The Mysql database and and CDM-Server are installed on the same logical machine (same IP address)
Just use jdbc:mysql://localhost/cdm_mexu as jdbcUrl in the datasources.xml
B) Mysql Server and cdm-server are running under different IP addresses:
e.g.:
- mysql server: 192.168.22.134
- cdm-server: 160.45.63.172
Please issue the following command to the mysql server. Replace 160.45.63.172 by the ip-address of the server where the cdm-server is running!
GRANT SELECT, INSERT, UPDATE, DELETE, CREATE, DROP, INDEX, ALTER, CREATE TEMPORARY TABLES, LOCK TABLES ON `cdm_user`.* TO 'cdmuser'@'160.45.63.172'
Afterwards, you may want to test if connecting the mysql server from the machine where the cdm-server is running.
mysql -u cdmuser -p -h 192.168.22.134 cdm_plantae
